Page Text
TEAM
40501
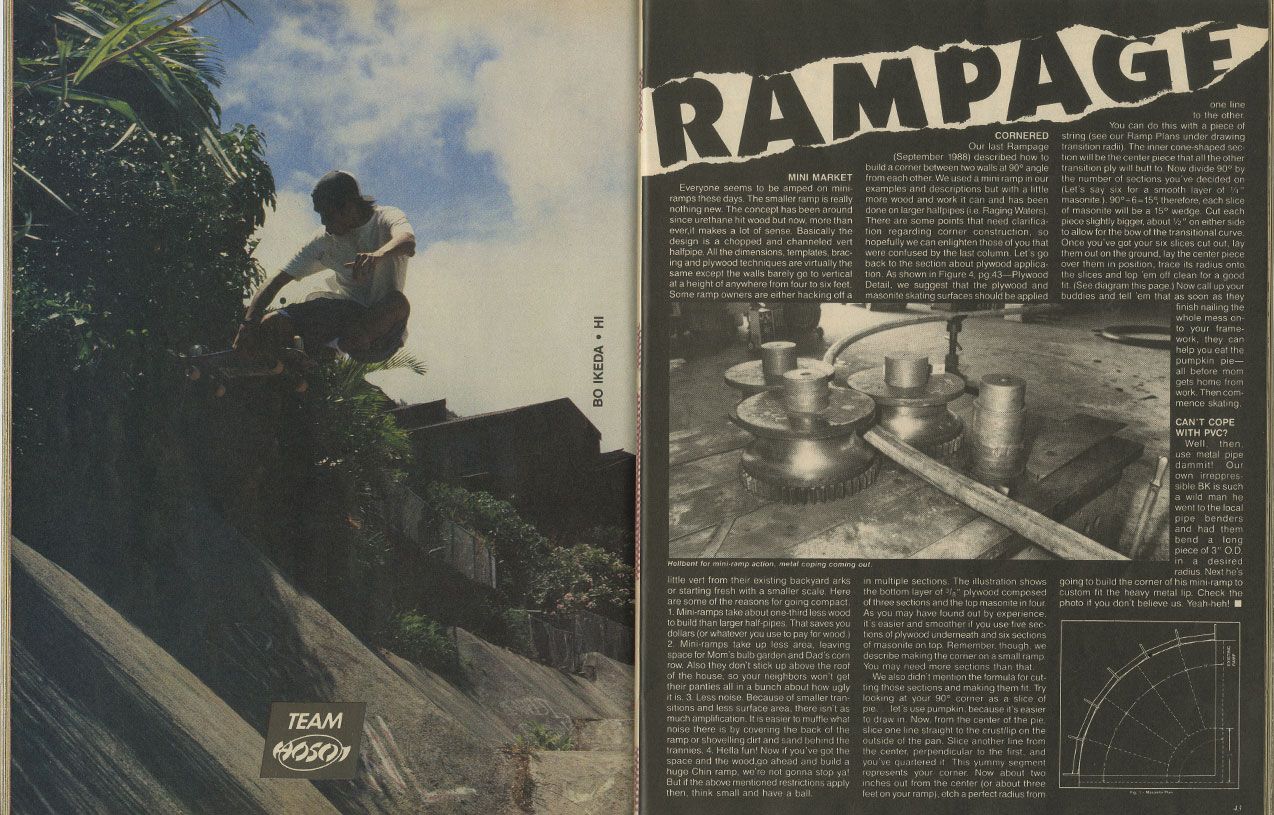
BO IKEDA ⚫ HI
RAMPAGE
MINI MARKET
Everyone seems to be amped on mini-
ramps these days. The smaller ramp is really
nothing new. The concept has been around.
since urethane hit wood but now, more than
ever, it makes a lot of sense. Basically the
design is a chopped and channeled vert
halfpipe. All the dimensions, templates, brac-
ing and plywood techniques are virtually the
same except the walls barely go to vertical
at a height of anywhere from four to six feet.
Some ramp owners are either hacking off a
Hellbent for mini-ramp action, metal coping coming
little vert from their existing backyard arks
or starting fresh with a smaller scale. Here!
are some of the reasons for going compact,
1. Mini-ramps take about one-third less wood
to build than larger half-pipes. That saves you
dollars (or whatever you use to pay for wood.)
2. Mini-ramps take up less area, leaving
space for Mom's bulb garden and Dad's com
row. Also they don't stick up above the roof
of the house, so your neighbors won't get
their panties all in a bunch about how ugly.
it is. 3. Less noise. Because of smaller tran-
sitions and less surface area, there isn't as
much amplification. It is easier to muffle what
noise there is by covering the back of the
ramp or shovelling dirt and sand behind the
trannies. 4. Hella fun! Now if you've got the
space and the wood.go ahead and build a
huge Chin ramp, we're not gonna stop ya!
But if the above mentioned restrictions apply
then, think small and have a ball.
CORNERED
Our last Rampage
(September 1988) described how to
build a corner between two walls at 90° angle
from each other. We used a mini ramp in our
examples and descriptions but with a little
more wood and work it can and has been
done on larger halfpipes (i.e. Raging Waters).
There are some points that need clarifica-
tion regarding corner construction, so
hopefully we can enlighten those of you that
were confused by the last column. Let's go
back to the section about plywood applica
tion. As shown in Figure 4, pg.43-Plywood
Detail, we suggest that the plywood and
masonite skating surfaces should be applied
out.
in multiple sections. The illustration shows
the bottom layer of "fa" plywood composed
of three sections and the top masonite in four
As you may have found out by experience.
it's easier and smoother if you use five sec-
tions of plywood underneath and six sections
of masonite on top. Remember, though, we
describe making the corner on a small ramp.
You may need more sections than that.
We also didn't mention the formula for cut-
ting those sections and making them fit. Try
looking at your 90° corner as a slice of
pie. let's use pumpkin, because it's easier
to draw in. Now, from the center of the pie.
slice one line straight to the crust/lip on the
outside of the pan. Slice another line from
the center, perpendicular to the first, and
you've quartered it This yummy segment
represents your corner. Now about two
inches out from the center (or about three
feet on your ramp), etch a perfect radius from
to the other
You can do this with a piece of
string (see our Ramp Plans under drawing
transition radii). The inner cone-shaped sec
tion will be the center piece that all the other
transition ply will butt to Now divide 90° by
the number of sections you've decided on
(Let's say six for a smooth layer of "
masonite.). 90°-6-15%, therefore, each slice
of masonite will be a 15° wedge. Cut each
piece slightly bigger, about " on either side
to allow for the bow of the transitional curve..
Once you've got your six slices cut out, lay
them out on the ground, lay the centerpiece
over them in position, trace its radius onto
the slices and lop 'em off clean for a good
fit. (See diagram this page.) Now call up your
buddies and tell 'em that as soon as they
finish nailing the
whole mess on-
to your frame-
work, they can.
help you eat the
pumpkin pie-
all before mom
gets home from
work. Then com
mence skating.
CAN'T COPE
WITH PVC?
Well then.
use metal pipe
dammit! Our
own irreppres
sible BK is such
a wild man he
went to the local
pipe benders
and had them.
bend a long
piece of 3" O.D.
in a desired
radius. Next he's
going to build the corner of his mini-ramp to :
custom fit the heavy metal lip. Check the
photo if you don't believe us. Yeah-heh!