Page Text
CHARNISH
39
EVEN SO LOST
00 IS IT
TRADERE
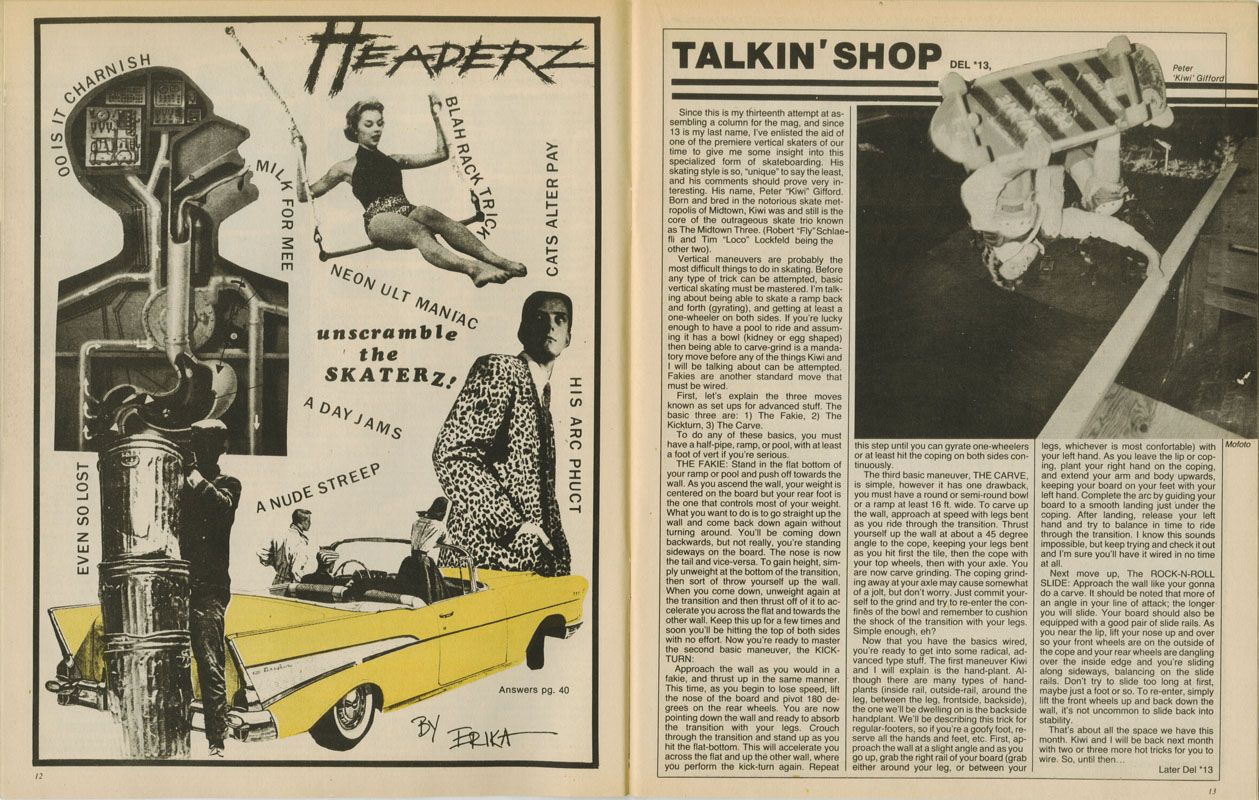
TALKIN'SHOP
DEL 13,
Peter
"Kiwi' Gifford
LK FOR MEE
MILK
BLAH RACK TRIC
NEON ULT MANIAC
unscramble
the
SKATERZ!
A DAY JAMS
A NUDE STREEP
CATS ALTER PAY
Answers pg. 40
BY ERIKA
HIS ARC PHUCT
Since this is my thirteenth attempt at as-
sembling a column for the mag, and since
13 is my last name, I've enlisted the aid of
one of the premiere vertical skaters of our
time to give me some insight into this
specialized form of skateboarding. His
skating style is so, "unique" to say the least,
and his comments should prove very in-
teresting. His name, Peter "Kiwi Gifford.
Born and bred in the notorious skate met-
ropolis of Midtown, Kiwi was and still is the
core of the outrageous skate trio known
as The Midtown Three. (Robert "Fly" Schlae-
fli and Tim "Loco" Lockfeld being the
other two).
Vertical maneuvers are probably the
most difficult things to do in skating. Before
any type of trick can be attempted, basic
vertical skating must be mastered. I'm talk-
ing about being able to skate a ramp back
and forth (gyrating), and getting at least a
one-wheeler on both sides. If you're lucky
enough to have a pool to ride and assum-
ing it has a bowl (kidney or egg shaped)
then being able to carve-grind is a manda-
tory move before any of the things Kiwi and
I will be talking about can be attempted.
Fakies are another standard move that
must be wired.
First, let's explain the three moves
known as set ups for advanced stuff. The
basic three are: 1) The Fakie, 2) The
Kickturn, 3) The Carve.
To do any of these basics, you must
have a half-pipe, ramp, or pool, with at least
a foot of vert if you're serious.
THE FAKIE: Stand in the flat bottom of
your ramp or pool and push off towards the
wall. As you ascend the wall, your weight is
centered on the board but your rear foot is
the one that controls most of your weight.
What you want to do is to go straight up the
wall and come back down again without
turning around. You'll be coming down
backwards, but not really, you're standing
sideways on the board. The nose is now
the tail and vice-versa. To gain height, sim-
ply unweight at the bottom of the transition,
then sort of throw yourself up the wall.
When you come down, unweight again at
the transition and then thrust off of it to ac-
celerate you across the flat and towards the
other wall. Keep this up for a few times and
soon you'll be hitting the top of both sides
with no effort. Now you're ready to master
the second basic maneuver, the KICK-
TURN:
Approach the wall as you would in a
fakie, and thrust up in the same manner.
This time, as you begin to lose speed, lift
the nose of the board and pivot 180 de-
grees on the rear wheels. You are now
pointing down the wall and ready to absorb
the transition with your legs. Crouch
through the transition and stand up as you
hit the flat-bottom. This will accelerate you
across the flat and up the other wall, where
you perform the kick-turn again. Repeat
this step until you can gyrate one-wheelers
or at least hit the coping on both sides con-
tinuously.
The third basic maneuver, THE CARVE,
is simple, however it has one drawback,
you must have a round or semi-round bowl
or a ramp at least 16 ft. wide. To carve up
the wall, approach at speed with legs bent
as you ride through the transition. Thrust
yourself up the wall at about a 45 degree
angle to the cope, keeping your legs bent
as you hit first the tile, then the cope with
your top wheels, then with your axle. You
are now carve grinding. The coping grind-
ing away at your axle may cause somewhat
of a jolt, but don't worry. Just commit your-
self to the grind and try to re-enter the con-
finès of the bowl and remember to cushion
the shock of the transition with your legs.
Simple enough, eh?
Now that you have the basics wired,
you're ready to get into some radical, ad-
vanced type stuff. The first maneuver Kiwi
and I will explain is the hand-plant. Al-
though there are many types of hand-
plants (inside rail, outside-rail, around the
leg, between the leg, frontside, backside),
the one we'll be dwelling on is the backside
handplant. We'll be describing this trick for
regular-footers, so if you're a goofy foot, re-
serve all the hands and feet, etc. First, ap-
proach the wall at a slight angle and as you
go up, grab the right rail of your board (grab
either around your leg, or between your
legs, whichever is most confortable) with
your left hand. As you leave the lip or cop-
ing, plant your right hand on the coping.
and extend your arm and body upwards,
keeping your board on your feet with your
left hand. Complete the arc by guiding your
board to a smooth landing just under the
coping. After landing, release your left
hand and try to balance in time to ride
through the transition. I know this sounds
impossible, but keep trying and check it out
and I'm sure you'll have it wired in no time
at all.
Next move up, The ROCK-N-ROLL
SLIDE: Approach the wall like your gonna
do a carve. It should be noted that more of
an angle in your line of attack; the longer-
you will slide. Your board should also be
equipped with a good pair of slide rails. As
you near the lip, lift your nose up and over
so your front wheels are on the outside of
the cope and your rear wheels are dangling
over the inside edge and you're sliding
along sideways, balancing on the slide
rails. Don't try to slide too long at first,
maybe just a foot or so. To re-enter, simply
lift the front wheels up and back down the
wall, it's not uncommon to slide back into
stability.
That's about all the space we have this
month. Kiwi and I will be back next month
with two or three more hot tricks for you to
wire. So, until then....
Later Del 13
13
Mofoto