Page Text
RAMP WORLD
EXTRA POINT:
if you look at
the bare
framework of
Mike McGill's
mini (above),
you'll see a
2x4" with the
4" side up in
the middle of
the transition.
This is used to
make the
area wider
and stronger
where the
pieces of ply
wood join an
the first layer.
Make these
by nailing
two 2x4's in
a T-shape. At-
tach them like
a normal
crossbrace,
with the 4"
side up, every
4' on the
transition.
28 THE MAGNE
WAKE UP CALL
Well, kids, the time is now. It's Saturday
morning, wake up your Dad and get your
pals together. Today's lesson is "How to
build a mini." Last month we told you how
to lay the groundwork for that project of
projects, the backyard ramp. Now it's time
to get to work. Gather all the materials be-
lore you build so you can keep working
once you've started. The key to this puzzle
is to take your time with each step. If you're
tempted to rush things so you can skate
Sooner, take a break and go work off some
steam in the driveway.
GET IT TOGETHER
FROM THE
GROUND UP
Lay two 2x6's
end-to-end. Lay the
other two end-to-
end eight feet to
one side, parallel.
Block those up so
they're level, using a
string line, a 4-foot
level or a 2-foot
level with an 8-foot
stud. Level every-
thing lengthways
and widthways. Set
your ramp sections
right on top of that.
To make the flat-
bottom, build a box-
using two 12' 2x4's
and thirteen B' 2x4's
cut 92% Frame it out and nail your 2x4's
on 1' centers. Because your plywood is cut
square, lay two sheets on top of the flatbot
tom framing to square the corners. This
way, when you push your transitions up
against your flatbottom, they will line up. If
they don't, you're in trouble. Square up and
nail down three sheets of plywood and
your flatbottom framing is complete.
THE BARE BONES
Build the 8' wide transition framing sec-
tions using plywood templates and 8'
2x4's cut at 94%. Make your first template
by squaring up two sheets of plywood
The following list outlines all you'll need
(except brains and tools) to build an 8
wide. 36' long, 6x high mini-ramp with 8'
transitions, 12 of flat and 4' decks with rail-
ings. Supplies should run about $500. If
you want a wider ramp, just double or triple.
the recipe and slide the eight-foot sections
together before you attach the second layer 3.5
of plywood. If you want a shorter ramp,
good alternate size combos are: 5% tall
with 7% transitions, 5' tall with 7' transitions
or 4' tall with 7 transitions.
4-8x4x plywood transition templates)
18-8x4x plywood (two layers of surface)
2-8x4x plywood (decks)
9-8x4x tempered Masonite (tinal layer)
2-12x2x4 flatbottom)
60-8x2x4 (flat, transition & platform bracing)
4-16x4x4 (transition and deck support)
4-16x26 (foundation
15 lbs. 2 drywall screws (attach Masonite)
16 foot at pipe or pool coping
1 b. 3 drywall screws (attach coping)
25 lbs. #12 common coated sinkers (indoors)"
25 lbs #12 common galvanized nails (outdoors)"
"It your ground isn't level, you'll need four 16
2x6's for a foundation.
"If the ramp is indoors, use #12 coated sinkers. It
it's cutdoors. use #12 galvanized nats
broc
TOP VIEW
SIDEVIEW
b
d
scrp
P
pywood
66
and tracing a
quarter arc of an
8' radius circle
using a 2x4" like
a compass (see
diagram). Leave
3% of wood at
the bottom. Cut it.
out along the line
and then at the height you want (6'6").
Mark this template and use it as a master
to trace the others. If you don't, you're sure
to screw up the ramp. Square the edges
and trace other templates on full sheets of
plywood and scraps of another.
Nail a 16 4x4 to the back of each transi-
tion template running vertically. Cut off the
excess and use it for the vertical supports
on the back of the platform and handrail.
Use 2x4's cut at 94% for each transition
framing section. Nail them with the 2" side
up, flush with the edge of the plywood, on
eight-inch centers. Eight-inch centers give
you good support underneath your ply
wood, more to nail into and make every
thing a lot rounder. Nail a 2x4" T-brace
every four feet up the transition. (Details in
caption at left.)
SKIN TIGHT
If you've got the money, spend it on
higher quality plywood (AC or a DC both
sides sanded, no knots, better glue) be-
cause it'll last longer. Nail the transition.
framing sections to the flatbottom framing
and then apply the first layer of ply on the
transitions. Take care when nailing on the
first layer, since any kink or bump gets
worse with each layer. Your first layer
should look good enough to skate on.
Make sure the plywood and the templates
are square on all edges. If your ramp is
going to be wider than eight feet, join the 8'
wide ramp sections together now.
When you apply the second plywood
layer, stagger the seams or they will
become kinks. Start your second layer on
an outside edge 2' up from the bottom of
the transition with a half sheet of plywood
cut lengthwise and your horizontal and
vertical seams should not overlap
AT LAST
Use 2"-2½ inch drywall screws to attach
the final Masonite layer. Line the sheets up
so the seams are staggered from the
second layer, and then chalk your lines
where you nailed your 2x4's from end to
end on the ramp. Use a regular " drill bit
to barely drill into the Masonite and make a
countersink hole so your screw heads go
below the surface of the Masonite.
If the ramp is outdoors, pressure-treated
plywood will weather the elements better
than Masonite for the final layer. Another
way of protecting from the weather is to
water-down latex paint and paint the wood.
then put two more layers of regular latex
paint on top of that. Finishes like Thomp-
son's Water Seal or varathane will make
the surface too slippery.
A good distance to set the coping is
-out, whatever you like better. For
pipe coping, drill a hole through the top
large enough to put a screwdriver through
and a smaller hole through the bottom to
put a screw through. Use the 3" drywall
screws to fasten it down. For pool coping.
use bolts and plenty of caulking.
That should cover it. Pay attention to de-
tails and build carefully. Then, when you
are finally skating the ramp you built
yourself, you will feel like you're on top of
the world
-Tim Payne
RAMP OF THE MONTH
Gary and David Waters' mini, in
Kingman, Arizona, is a stunning
example of the latest in "ditch" style
backyard design. The quick transi-
tions and desert setting add an extra
element of realism that is guaranteed
to bring good times. We're with Mom
Waters when she says she "can't
understand why any mother would
be against skating when it is such
good, clean fun."
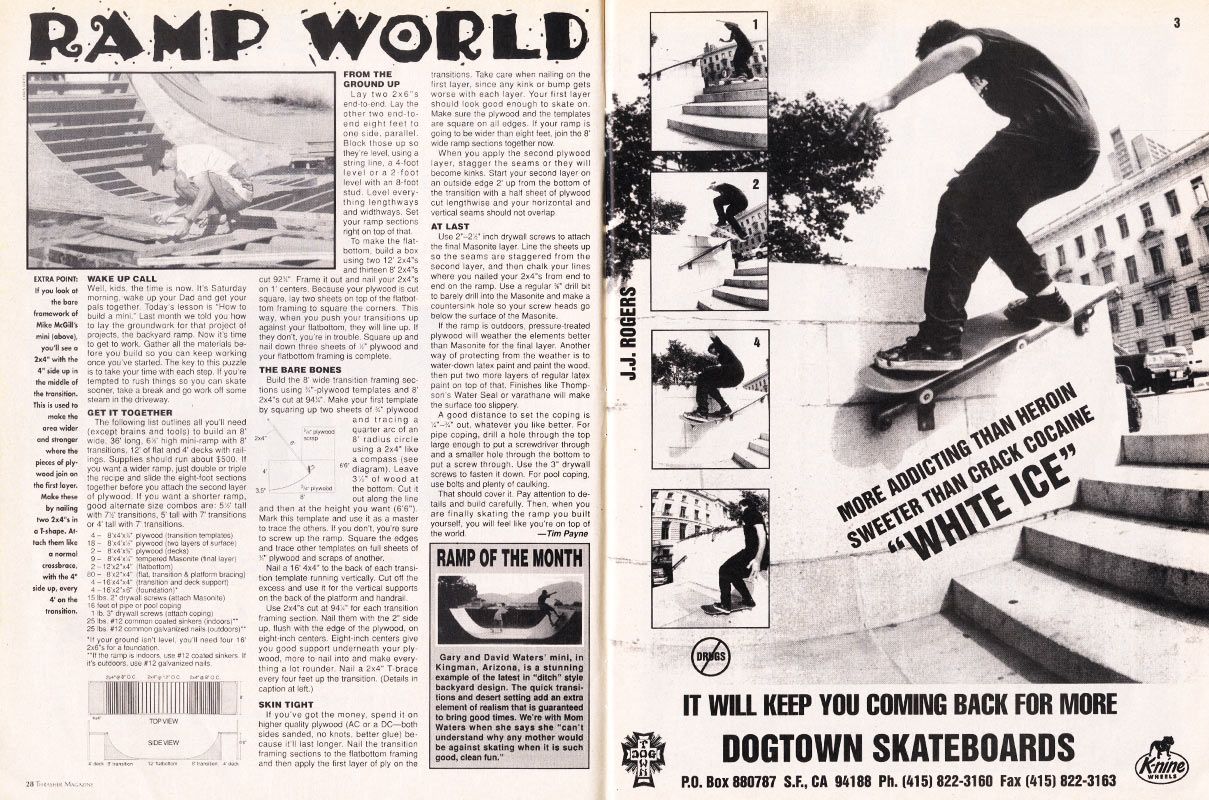
J.J.
ROGERS
1300
DRUGS
MORE ADDICTING THAN HEROIN
SWEETER THAN CRACK COCAINE
"WHITE ICE"
IT WILL KEEP YOU COMING BACK FOR MORE
DOGTOWN SKATEBOARDS
P.O. Box 880787 S.F., CA 94188 Ph. (415) 822-3160 Fax (415) 822-3163
Knine
WHEELS