Page Text
RAMP-EDGE
STRUCTURES FOR STREET PEOPLE
In recent issues, I've talked mainly about
halfpipe ramps. This month I'll cover some
of the newest basic street-type obstacles
found at contests of every level. During the
winter months ahead, small street obstacles
will be an asset in garage and empty building
sessions. Here are some big toys that are
fairly easy to build with basic tools.
The most widely accepted street terrain
obstacle today is the stage set-up. Crowned
with pipe (PVC or steel bar) around the
edges, a stage is perfect for slide 'n' rolls or
lengthy ollie-to-grinds. Anything can be
added to the sides of your stage: a slider bar
simulating a handrail, an ollie ramp leading
up to it lengthwise or spine can replace the
slider bar for more versatility. It can be
straight or in the shape of a downhill wave.
A long quarterpipe which extends six inches
higher than the top of the stage enables you
to slide 'n' roll into disaster or ollie off the
quarterpipe to handrail slide. A small angled
wall may be built along one side by using a
shim (3" or more) at the bottom of the wall,
between plywood and the stage. This
also works on the backs of jump ramps.
The most basic stage design starts with
one 4'x8' sheet of plywood (%", " or "
wide). Nail 2x4's (8' lengthwise and 3'9"
across, with the 2" face to the ply) to frame
the bottom of the ply. You'll need four more
of the same size pieces for a base. Next cut
ten 2x4's the desired height of the stage and
nail them to the inside of your ply frame (four
along each 8' side, with one more in the
middle of the 3'9" side). Frame the bottom
with the same type of box you made for the
top, and add cross braces for extra strength
if necessary.
To build a jump ramp up to the stage, follow
normal building procedures with two tem-
plates and 2x4"s for cross bracing. If you're
going to have a handrail at one end, I suggest
a mellow quarterpipe at the opposite end for
easy access. Construction of the handrail is
fairly simple. You need two 2x4"s and one
2x6" cut to whatever length you desire. Nail
the 2x4's to both sides of the 2x6", making
sure the bottoms are flush. Slap the coping
of your choice on both sides of the 2x6" and
screw into the 2x4"s (see last month's col-
umn for more detailed coping attachment
instructions). Now you have a completed
slider bar/handrail. Depending on the height
and angle you want, you can either secure
your handrail directly to the stage and have
the other end rest on the ground or nail 2x4"s
to the sides to raise one or both ends for
greater height or steepness. If you raise the
rail on both ends, connect the bottoms of your
struts with another 2x4" for extra stability.
Now that you know how to build a basic
slider bar, here's a bit of a twist for a slanted
curb on the flat ground. Rip plywood into five-
or six-inch wide strips as long as the bar, add
thin scraps of wood between the ply and the
base of the slider, and nail it all together. Now
you have angled sides on your rail for slap-
ples and feeble type maneuvers.
A transition to wall ramp is another com-
mon obstacle that let you pick up speed to
hit other parts of the course without pushing.
Some of these structures have decks atop
the quarterpipes with an extended vertical
wall in between the two ramps for ramp-to-
ramp transfers, while others have vertical
walls that extend past the ramps for ramp-
to-wall rides (see photo). Build your wall by
sandwiching plywood (%a" or ") around
by Don Fisher
2x4's spaced about sixteen inches apart.
Tack on horizontal struts at the base of the
back of the wall so it won't fall over. These
only need to extend out of the back since the
quarterpipes will support the front. Construct
two tight quarterpipes in the usual manner,
making sure nothing sticks out of the back
so they sit flush, and nail them to the wall.
Crown the wall with coping, add decks if you
want, and you're ready to go.
Sidewalks have been showing up more
frequently at organized contests. The ollie on
to 180° ollie off is one of the many maneuvers
made possible by this form. To build it, top
a frame of 2x4's with thick plywood. Connect
the segments end to end, making sure the
end plys share 2x4's so you don't get any
unwanted nollie cracks.
You can build practically anything out of
wood, so let your imagination run wild. Till
next time, let your skating adapt to your
designs and let your designing adapt to your
skating.
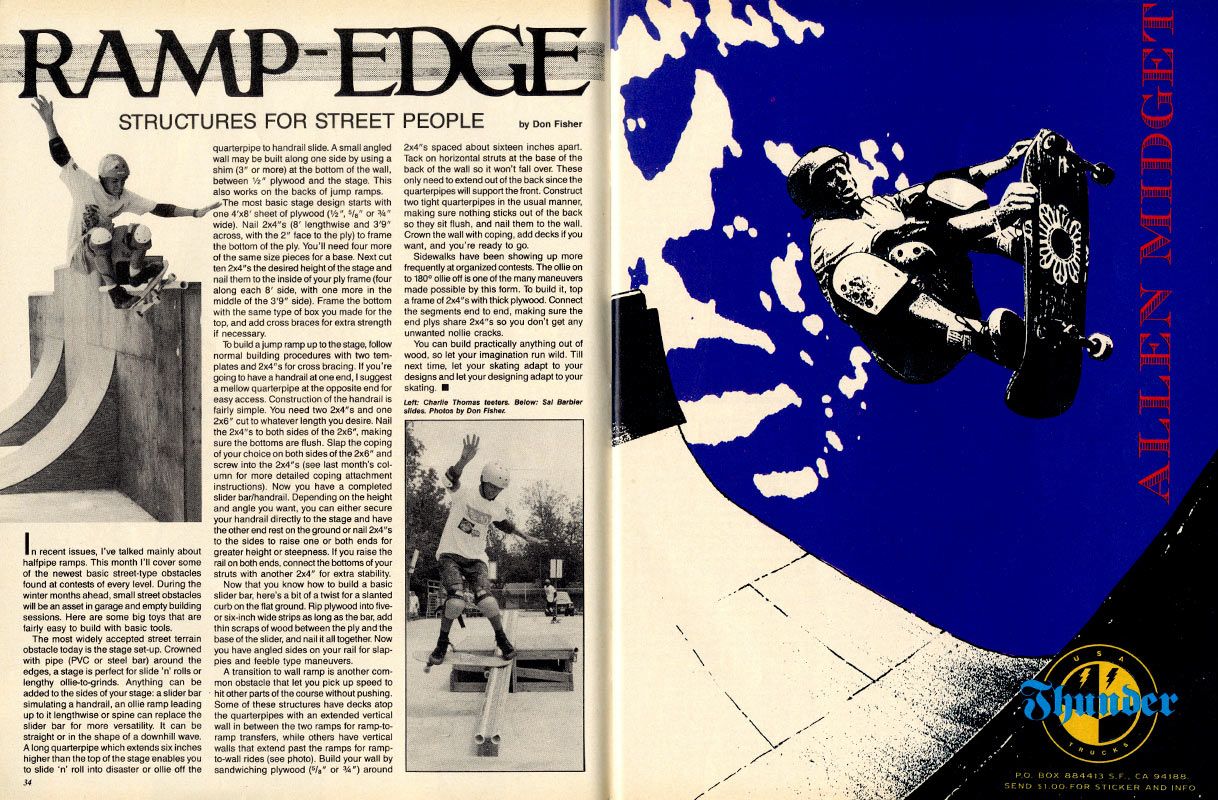
Left: Charlie Thomas teeters. Below: Sal Barbier
slides. Photos by Don Fisher
ALLEN MIDGET
Shunder
P.O. BOX 884413 5.F., CA 94188.
SEND $1.00. FOR STICKER AND INFO